In this weeks tutorial we’ll be creating a WordPress widget to display the current weather for a specified location. To do this we’ll be using the great Weather Underground API. You can sign up for a free developer account here, or sign up for a professional account to get increase request rates.

SIGNING UP
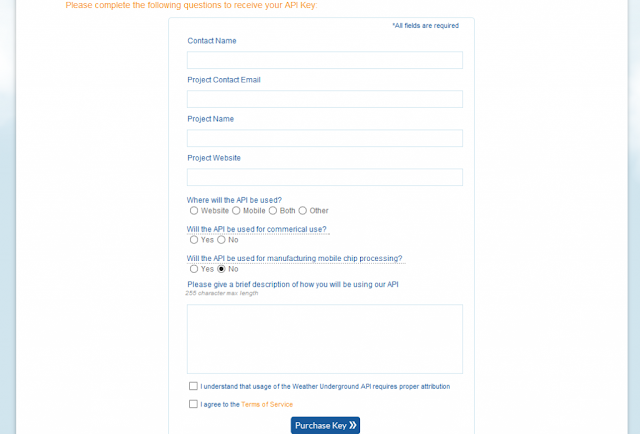
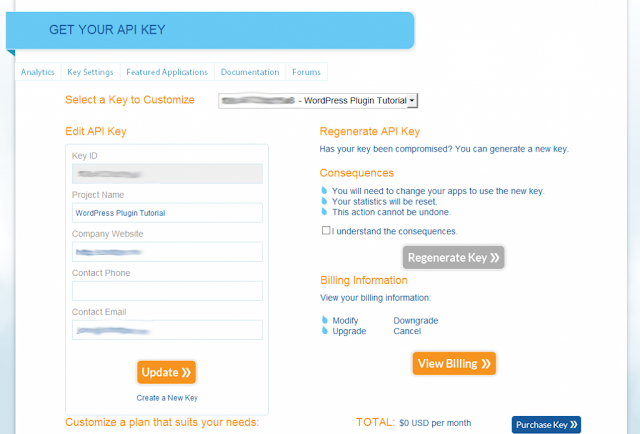
Once you’ve signed up and registered for your API key, you should see something like the following. To actually query the API we just need the API key. The Wunderground API does not use OAuth to authenticate requests, we just include the key in our request URI.
CREATING THE WIDGET
The first thing we need to do is add the WordPress plugin meta comments. This will allow us to activate the widget as a plugin via the Dashboard. If you’re writing a custom theme you can just include the final widget code in your functions.php or call it using require_once or include_once functions.
/*
Plugin Name: Wunderground Widget
Plugin URI: http://schnittger.me
Description: A Widget for displaying the current weather using the Wunderground API
Version: 1.0
Author: Jonathan Schnittger
Author URI: http://schnittger.me
License: GPL2
*/
Next up, we need to create our basic Widget class. Widgets in WordPress all extend the WP_Widget class. There are 4 functions that all Widgets must implement:
- The constructor (__construct), initializes the widget
- The render method (widget), outputs the widget HTML and performs any work unique to the widget instance.
- The form editor (form), allows the user to update the widget options
- The widget updater (update), takes the submitted options from the form and saves them
class Wunderground_Widget extends WP_Widget {
    public function __construct() {
    }

    public function widget( $args, $instance ) {
    }

    public function update( $new_instance, $old_instance ) {
    }

    public function form( $instance ) {
    }
}
THE CONSTRUCTOR
The __construct method simply needs to call the parent WP_Widget __construct method and pass in some basic configuration values. The first is the widget identifier, followed by the widget name and an optional array. The array can be used to specify a description or the default class.
public function __construct() {
    parent::__construct(
        'wunderground_widget',
        'Wunderground Widget',
        array( 'description' => 'A Widget for displaying the current weather using the Wunderground API' )
    );
}
THE FORM
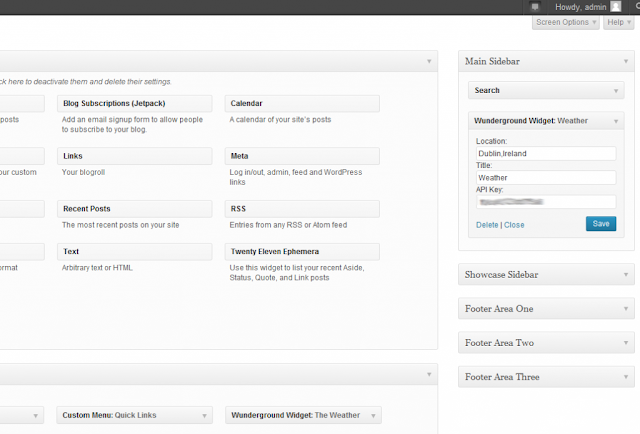
To configure the widget we’ll need to be able to save some instance configuration values such as the API key, the location we want to display and the title of the widget. To do this we use the get_field_id (not documented, but it’s there!) and get_field_name functions to help render the input elements. The form method also takes in a $instance parameter. This parameter contains the current configuration values for the widget.
public function form( $instance ) {
    if ( isset( $instance[ 'title' ] ) ) {
        $title = $instance[ 'title' ];
    }
    else {
        $title = 'New title';
    }

    if ( isset( $instance[ 'api_key' ] ) ) {
        $api_key = $instance[ 'api_key' ];
    }
    else {
        $api_key = '';
    }

    if ( isset( $instance[ 'location' ] ) ) {
        $location = $instance[ 'location' ];
    }
    else {
        $location = '';
    }
    ?>
    <p>
    <label for="<?php echo $this->get_field_id( 'location' ); ?>"><?php _e( 'Location:' ); ?></label>
    <input class="widefat" id="<?php echo $this->get_field_id( 'location' ); ?>" name="<?php echo $this->get_field_name( 'location' ); ?>" type="text" value="<?php echo esc_attr( $location ); ?>" />

    <label for="<?php echo $this->get_field_id( 'title' ); ?>"><?php _e( 'Title:' ); ?></label>
    <input class="widefat" id="<?php echo $this->get_field_id( 'title' ); ?>" name="<?php echo $this->get_field_name( 'title' ); ?>" type="text" value="<?php echo esc_attr( $title ); ?>" />

    <label for="<?php echo $this->get_field_id( 'api_key' ); ?>"><?php _e( 'API Key:' ); ?></label>
    <input class="widefat" id="<?php echo $this->get_field_id( 'api_key' ); ?>" name="<?php echo $this->get_field_name( 'api_key' ); ?>" type="text" value="<?php echo esc_attr( $api_key ); ?>" />
    </p>
    <?php
}
UPDATE
The update function is used to save the widget configuration. All we need to do is pull out the new values from the $new_instance parameter and return a cleansed array. We use the strip_tags function to remove any unwanted HTML elements.
public function update( $new_instance, $old_instance ) {
    $instance = array();
    $instance['title'] = strip_tags( $new_instance['title'] );
    $instance['api_key'] = strip_tags( $new_instance['api_key'] );
    $instance['location'] = strip_tags( $new_instance['location'] );
    return $instance;
}
RENDERING THE WIDGET
Now that we have a configured widget we can look at rendering it, this is where the widget function comes in. The widget function takes in 2 parameters the arguments and the instance values. The first thing we need to do is pull out our API key, location and title values. At this point we’re also going to register and enqueue our widget CSS using the wp_register_style and wp_enqueue_style functions.
As I previously mentioned the Wunderground API is very easy to use. It’s a simple GET request to the API url, including the API key, the features, the location and format you want. For this widget we’ll need to get the forecast and conditions features. Each feature you want is treated as a separate folder in the URI. So far our URI looks like this:
http://api.wunderground.com/api/<API KEY>/conditions/forecast/Next we add our actual query, this is done by adding a /q/ folder path to the URI and then adding the location specified in our settings and the format type as the extension. For this we’ll be using JSON, but you could also use Xml. One of the great things about how Wunderground have configured the location part of the URI is that you can specify a location like “Dublin,Ireland”, GPS co-ordinates like “53.2833229,-6.4250272” or even a parameterized geo-location lookup (autoip.json?geo_ip=<IP ADDRESS>). You could try and use the $_SERVER variable and REMOTE_ADDR value to try and get the weather for the current users location
http://api.wunderground.com/api/<API KEY>/conditions/forecast/q/<LOCATION>.jsonTo make the request, we simply pass the URI to the wp_remote_get function and parse out the result body, transforming it in to an object using json_decode.
public function widget( $args, $instance ) {
    extract( $args );
    $title = apply_filters( 'widget_title', $instance['title'] );
    $api_key = $instance['api_key'];
    $location = $instance['location'];

    wp_register_style('wunderground-style', plugins_url('wunderground/wunderground.css', dirname(__FILE__)));
    wp_enqueue_style('wunderground-style');

    $api_url = 'http://api.wunderground.com/api/'.$api_key.'/conditions/forecast/q/'.$location.'.json';
    $response = wp_remote_get( $api_url );

    $wunderground = json_decode($response['body']);
}
PARSING THE JSON
Since we now have our JSON object, we can start parsing it to populate our widget. The current weather is located in the current_observation property. This is where we can pull out the location, temperature, wind speed/direction and the humidity.
$current = $wunderground->{'current_observation'};
$location = $current->{'display_location'}->{'full'};
$temp = $current->{'feelslike_c'};
$wind = $current->{'wind_kph'};
$wind_dir = $current->{'wind_dir'};
$humidity = $current->{'relative_humidity'};
$summary = $current->{'weather'};
The forecast is located in the forecast property. This is is a little more complicated as we have to go a few levels deeper to get the information we’re looking for. The forecast property contains another object, txt_forecast, which then contains forecastday and finally an array of forecasts for the upcoming 24 hours. For this widget we’re only interested in the first forecast (this is essentially the current forecast)
$forecast = $wunderground->{'forecast'}->{'txt_forecast'}->{'forecastday'}[0];
$icon = $forecast->{'icon'};
$icon_url = $forecast->{'icon_url'};
$text = $forecast->{'fcttext_metric'};
Now that we have all of the values we need we can start outputting our HTML
<div>
    <div class="temp"><?php echo $temp ?>°C <img src="<?php echo $icon_url ?>" alt="<?php echo $icon ?>"/></div>
    <div class="location"><?php echo $location ?></div>
    <div class="wind">Wind: <?php echo $wind ?>kph (<?php echo $wind_dir ?>)</div>
    <div class="humidity">Humidity: <?php echo $humidity ?></div>
    <div class="summary" title="<?php echo $text ?>">Summary: <?php echo $summary ?></div>
</div>
To actually register the widget, we need to use the widgets_init action to call a function to in turn call the register_widget function
function wunderground_widgets_init(){
    register_widget( 'Wunderground_Widget' );
}
add_action( 'widgets_init', 'wunderground_widgets_init' );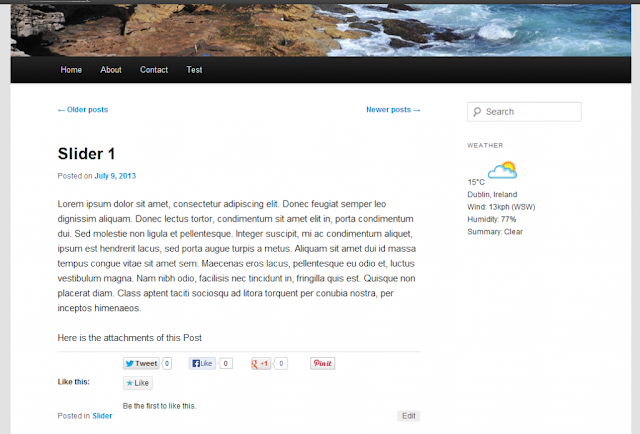
STYLING THE WIDGET
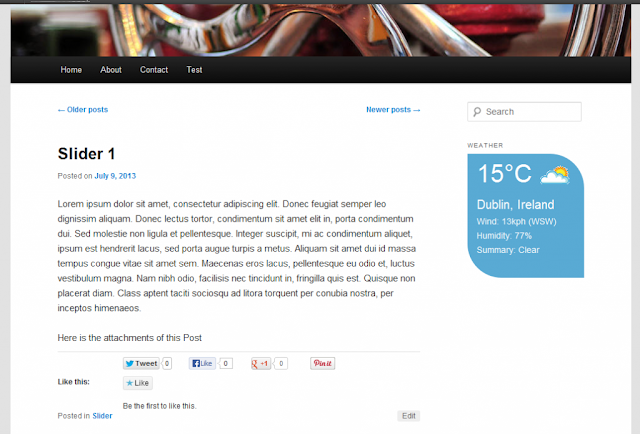
To style the widget I’ve gone with fairly double common rounded corner feel. You’ll see this in various mobile apps and I think it works quite well. To achieve this you simply set the border radius values for the top right and bottom left corners of the widget.
div.wunderground-widget  > div{
    -moz-border-radius-topright: 55px;
    -webkit-border-top-right-radius: 55px;
    border-top-right-radius: 55px;
    -moz-border-radius-bottomleft: 55px;
    -webkit-border-bottom-left-radius: 55px;
    border-bottom-left-radius: 55px;
}
I’ve then specified some colors and specified a large font size for the temperature and a medium size for the location. This gives the widget focus areas that make it easier to read. The full CSS looks like this.
div.wunderground-widget  > div{
    height: 200px;
    max-width: 200px;
    background-color: #59aad4;
    color: #ffffff;
    font-size: 14px;
    -moz-border-radius-topright: 55px;
    -webkit-border-top-right-radius: 55px;
    border-top-right-radius: 55px;
    -moz-border-radius-bottomleft: 55px;
    -webkit-border-bottom-left-radius: 55px;
    border-bottom-left-radius: 55px;
    padding: 0 15px;
}

div.wunderground-widget div.temp{
    font-size: 40px;
}

div.wunderground-widget div.temp img{
    vertical-align: middle;
}

div.wunderground-widget div.location{
    font-size: 20px;
    font-weight: light;
}
Both the CSS and the wunderground.php code are available in the download below.


Post a Comment