

Learn how to add subdomain in GoDaddy on this blog with easy methods explained. Before moving on to adding a subdomain, you need to understand what it is?
What is a Subdomain?
A subdomain is a subsection of the domain. It could be described as a smaller component of the parent.
- TLD- Top Level Domains are extensions. They are placed after the ending dot in the domain name. Like .com, .me, .org, etc.
- SLD- Second Level Domain are what make each domain unique and different from the other. You will find it before the last full stop.
Why Should You Know How to Add Subdomain in GoDaddy?
How to Add Subdomain in GoDaddy cPanel?
- STEP 1: Sign in to your GoDaddy account.
- STEP 2: Make sure you are in the My Products section. Here you can see all your purchases as well as the hosting plan.
- STEP 3: Select Manage.
- STEP 4: Click on cPanel.
- STEP 5: Move down by scrolling until you find Subdomains. Click on it.
- STEP 6: Another page will appear for the subdomain. Here, you have to enter the subdomain name you are willing to give. Any name is accepted. The Document Root will get automatically filled.
- STEP 7: Select Create.
- STEP 8: Your subdomain is created. Now you can add files in it using the file manager.
- STEP 9: Select your domain name from the list to access the Domain Settings page.


How to Add Subdomain in GoDaddy Without Web Hosting (Domain Control)?
- STEP 1: Sign in to your GoDaddy Domain Control Center account.
- STEP 2: Find the domain you want to create a subdomain for.
- STEP 3: Click on DNS to open the DNS Management page for that web address.
Here you can fall under two situations:
Situation 1- In case your NameSever is managed by an organization other than GoDaddy, DNS information won’t be displayed under Record. It means that you cannot create a subdomain on GoDaddy. For resolving this issue, open the hosting control panel where your domain is pointed to. Manage the DNS and create a subdomain there.
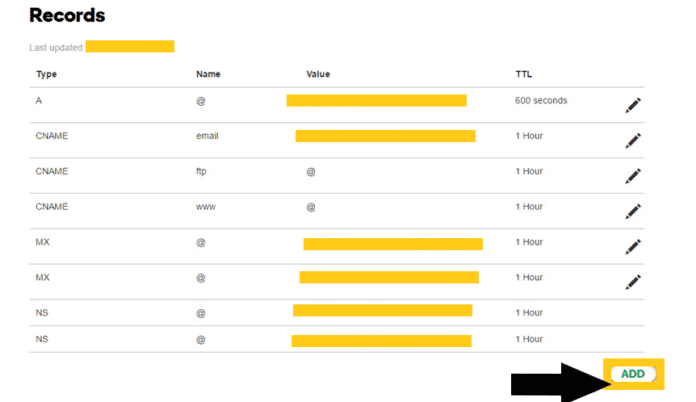
Situation 2- If your NameServer is managed by GoDaddy, all the DNS Management control settings will be displayed in the Domain Manager. - STEP 4: Click on Add below the Records part.
- STEP 5: Select the Type to discover a drop-down menu. Click on A.
- STEP 6: Now you are required to fill in the necessary information:
1. Host: Type your subdomain name in this column.
2. Points to: Enter the IP address to be pointed at by the subdomain.
3. TTL: Enter the maximum time for which the server should cache data. You can choose 10800 seconds for standardization. By default, 1 hr time is fixed. - STEP 7: Click on Save.


Post a Comment